Sunday, June 28, 2009

My secret garden

After 3 years, my mini garden is finally looking presentable.

On the left is the water feature and plants
Ginger, aloe vera, 'xi gu' in water and many other plants...
My pandan, mint and 'shui mei' on a rack hanging from the railing. Getting full sunlight for at least 4 hrs daily.

On the right is more plants

I am always working on having more 'greens' in my balcony mini garden and more importantly, is to get them free!

Which is the reason why when i have plant-able stuff, i will just dig a hole in the soil and hoping that it will grow.

Tried corindar roots, spring onion and ginger so far. Only ginger worked.
This the the ginger when the first shoots appear.
Do you know which one is the ginger now?

This is the baby aloe vera when I first started out too... its much bigger now, can u spot it?


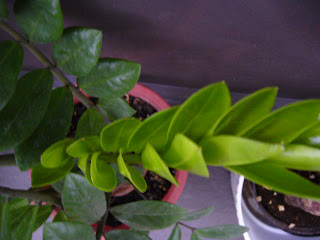
This is the first pot of money plant, it keeps growing new shoots now i end up with 3 pots!


Not forgetting my 'xi gu', harvested from the pond and planted in soil. Its another successful attempt to create many from one.


'Xi gu' in the pond on the left and right, circled in light purple
Ginger is the tall plant on the top left corner, circle in red
Aloe vera is beside the ginger, second from the left upper most corner, in light blue circle.
The ferns circled in black, they are all free! started growing from no where...

And once in a while, i get visitors...

Bloom...


My first flowering plant bought couple of weeks ago yield flowers.
Cant help but post this... taken against the clear blue sky.
It so beautiful i am speechless.

More pictures
My 'shui mei'


Tuesday, June 23, 2009

Garlic in olive oil


I previously posted Frozen garlic in oil, I realise later that there is no need to freeze the garlic. Makes the garlic lumpy and difficult to scoop out of the container for use.

As long as there is enough oil to cover the garlic, the garlic wont go bad. The oil, infused with garlic, is later used in the cooking as well. Just scoop out the galix with the oil. No need to pour extra oil when cooking... Save another step in my lazy cooking style.

Yeah!

Monday, June 22, 2009

Fuzhou fishball mee sua


Beautiful picture huh?
Red, green, brown, grey, olive, white....

Saturday went to MIL place for dinner, tabao home some old cucumber soup and she gave me 10 special fuzhou fishballs she bought from Chinatown market.
1 fishball costs 40cents okay? Not cheap hor... MIL say fuzhou fishball normally cost 30cents each. This is more ex cos its really special.

For those of u who dont know what is fuzhou fishball, the reason why its so ex is because this fishball has minced pork in the centre. For this 40 cents one, its REALLY good. When u bite into it, the juice of the minced pork will spurt out. Hubby's shorts kena. Haha.....

What do you need?
- Stock (any leftover soup for 2 u have in the fridge - dilute with 1/2 the amount of water)
- 6 fuzhou fishball (3 per pax)
- 1/4 pack of minced pork (makes around 20 meat balls)
- 4 stalks of chye sim (wash and cut into 2 inch long)
- 1 pack of chilli brand mee sua (4 bundles, 2 per pax)
- 6 prawns (3 per pax)

How to do it?
In separate bowls, marinate minced pork and prawn with soya sauce, pepper, sesame seed oil and chinese wine.

Pot 1: Pour stock (about 2 bowls) dilute with 1 bowl of water into a pot. Bring to boil.
Place fuzhou fishballs into soup, cook until fishball floats to surface.

Add 1 tsp of corn flour into minced pork, mix well, scoop minced pork onto palm of hand to make into tiny meatballs and throw them into soup to cook.

In Pot 2, bring 3 cups of water to boil. Place 4 bundles of mee sua into water and cook for 2 mins. Stir with chopsticks to separate the mee sua. Dont over cook. Drain away hot water and divide the mee sua into 2 big bowls.

In pot 1, add prawns and chye sim, bring to boil.

Scoop fuzhou fishball, prawn, chye sim and meatballs into bowl with mee sua. Pour in stock.

Put a dash of fried shallots and pepper in the soup.

Serve.

Saturday, June 20, 2009

Chicken rice - Lazy style

This is my version of the lazy chicken rice.
All in one dish.

My mum cooks the raw marinated chicken and raw sliced ginger with washed rice in the rice cooker directly. This method is more fuss free but results in mashy rice.

For me, i will stir fry the ginger, chicken and rice in the pan first.
With the rice grain coated in a bit of oil before cooking, the cooked rice will be grainy.
Of cos, its more work for me (have to wash extra wok)

Will cook this for dinner when all i have is chicken in the fridge.
Hubby always enjoy this dish cos it has meat (chicken) and meat (sausage)
Serve with prawn sambal on the side (hei bee hiam)
Mouth watering.


What do you need?
- 1 chicken breast (sliced)
- 1 cup of rice (wash and drain, serves 2 pax)
- 1 piece of ginger (size of thumb, sliced)
- 1 chinese sausage (skin removed)
- Pepper, soya sauce, sesame seed oil

How to do it?
Marinate chicken with pepper, soya sauce, chinese wine and sesame seed oil for at least 20 mins.

Heat wok, pour in 2 tbsp of sesame seed oil and fry sliced ginger over low heat.
Wait for ginger to turn crisp


Add 1 tsp of corn flour to chicken, mix well.
Add sliced chicken into wok and stir fry until brown. Push chicken to side of the pan, pour in uncooked and washed rice.

Add 2 tbsp of soya sauce, some pepper and chinese wine. Mix well.
Scoop rice into rice cooker.


Add water into rice cooker as if you are cooking plain white rice.
Place chinese sausage into rice cooker as well.


Cook rice in rice cooker as per normal.
When rice is ready, serve with chilli or sambal on the side.

Friday, June 19, 2009

Marusui Fish Market

For a long time (about 2-3 years already), hubby and i are 'fans' of Sakuraya fish market and will visit once every 2-3 mths. As we dont drive, we have to take the bus there to have sashimi fix every once in a while.

One fateful Saturday, hubby and i wanted to grab a quick snack at vivo basement (i love the fried vege pancakes they have).

As usual, he is the vivo guide and he took escalator near Marks & Spencer and make me walk through the carpark. Though i dont quite agree its a 'shortcut' route, i dont know the otherwise correct route so i just follow...

And to our pleasant surprise, we chance upon Marusui Fish Market.

The concept is very similar to Sakuraya: fresh sashimi on sale in chillers (they will slice it for you immediately if you want to dine in), ready made sushi and bento sets; some bread, green tea, japanese sauces on shelves; as well as tables and chairs for casual dine in.

I am attracted by the snow crab (cooked but cold) which is on promotion - $8 for half snow crab.

So instead of grabbing a quick snack, we had early dinner at 5pm and finish off with 3 scoops of Bens & Jerry for desserts! Yummy.


The freshness of the sashimi cannot match Sakuraya but for the price, it still ok.

4 sashimi (Scallop, salmon, sword fish and something-else-i-cant-remember), 1/2 snow crab, 1 bowl of sushi rice with a can of Asahi and one cup of green tea - total damage ~ $50

Will i go again? Probably yes, for a quick sashimi fix. The bentos and handrolls look very good, will go back to try them one day.

Full address:

Saturday, June 13, 2009

Yam Cake


This is my first attempt at making a dish i learn at the dim sum course...
The receipe my instructor gives out is superb!!! Her hints and tips are so good, its almost impossible to fail...
The receipe below yields one tray 21cm baking tin but 1 yam the size of my hand sold in supermarkets is approximately 1kg with skin on. I bought 2 so after removing the skin, i have approximately 1800gm of yam so i made 3 portions and yield 4 baking tins of yam cake.
With 300gm more yam, i simply add them to the fried diced yam without increasing the amount of flour and it worked out fine.

What do you need

Ingredients A:
Rice Flour 300gm
Tang mien flour (Wheat Starch) 75gm
Water 300gm/330ml

Ingredients B:
Yam without skin 500gm
Dried scrimps 50gm (Wash, Soaked, diced)
Chinese sausage 1 piece (Skinned, diced)
Chinese mushroom 4 pieces (Wash, Soaked, diced)
(Keep all the water from soaking scrimps and mushroom and use its as 'water' later in the cooking)

Seasoning:
Salt 20gm
Msg 20gm (i omit totally)
Sugar 40gm
1/4 tsp pepper
1/4 tsp five spice powder
1 tbsp sesame seed oil

Preparing the yam:
Skin yam with potato peeler. Wash whole. Take 300gm of yam, slice thinly and place in baking tin with water covering it slightly. Steam until its soft and mash-able. Steaming takes approximately 15 mins. Pour out access water before mashing. Mash immediately while its hot. Slowly add more water if required. You should get a fine mash.

For the remaining 200gm of yam, dice into 1.5cm by 1.5cm cubes.
Fry in oil until golden brown. Set aside.

How to do it?
In a separate bowl, whisk ingredients A and seasoning until you get a smooth mixture.
Armed with the ingredients below, we can now start to cook the yam paste.

Heat wok with oil (i used oil from frying the yam earlier combined with shallots oil from frying shallots. Fry dried scrimps, chinese sausage and mushroom until the mixture becomes fragrant and the oil becomes foamy.

Add fried yam (the foam will all disappear) to make it crisp again.
Adding 1000gm/1110ml of water into wok.
By now, the mash yam should have absorbed all the water and is a very thick and lumpy.
Add 200gm/220ml of water, mix well and you will get a watery yam paste again.

Add yam paste into the wok, mix well. Bring to boil.

Take bowl with ingredients A, whisk up the flour and seasoning that has settled to the bottom of the bowl. Scoop 2-3 ladles of the soup from the wok into the flour mixture and mix well.
This will increase the tempreature of the flour mixture.
Turn off heat.
Pour flour mixture into wok and quickly mix well. You will get a lumpy, sticky yam paste.
Scoop yam paste into baking tin (greased with oil).
Steam over water for at least 45 mins. Only place the tin into the wok after the water has boiled.
The final product. Dont worry about the yam cake being soft and wobberly when hot.
It will harden when cooled.
Flip the yam cake over onto a plate (it will slide out effortlessly from the tin cos we coat the tin with oil) to cool faster.

Wednesday, June 3, 2009

Red husk rice wine

Another of my 'chu' pattern stunt... wine making!
The teochew or cantonese use this to make 'ang cheow' wine and use the 'ang cheow' residue for cooking.
My grandma makes this wine for my grandfather to drink. After she knows that hubby's family cooks 'ang cheow' chicken, she happily gave them all to me (she used to have no one to give to and pass them to neighbours)

Magic proportions:
- 1 kg of glutinous rice
- 2 wine biscuits
- 2 'liang' of red rice husk

How to do it?

**IMPORTANT**ALL equipment must be dirt and oil free, wear gloves at all time or handle with clean dry hands**Failure to adhere to the above will result in contamination and the entire mixture will turn mouldy and wine will turn sour**

Cook 1 kg of glutinous rice in rice cooker as if you are cooking fragrant white rice. Put about 10-20% more water....

After rice is cooked, let it cook until it can be handled by hand.
Do not let it cook totally or else u will end up with a sticky hard lump of rice that is impossible to mix.


While rice is cooling, break 2 pieces of wine biscuit (chinese yeast) into fine pieces. Remember to store this in the freezer when not in use else it will lose its 'effects'.


Pair with two 'liang' of red rice husk. Crush them slightly.


Mix wine biscuit and red rice husk with glutinous rice and 1 cup of room temperature boiled water.


Place in a sterile container to ferment in air tight condition.

Day 1 and 2 - No change


Day 3 - you will start to see wine like liquid starts to fill in the empty spaces and air pushed out as air bubbles.


On the 4th day, the rice will suspend atop a layer of wine (about 1 inch thick) - sorry no photo

On this day, you are suppose to open the container, mix it well with another cup of room temperature boiled water. This is the last time you are suppose to open the container and touch the mixture.

Seal the container tightly for 1 last time and leave it to ferment for 1 mth (day 1 to day 30)
~~~~~~~~~~~~~~~~~~~~~~~~~~~~
Update on day 7


**this post will be updated regularly until day 30**